Word 2010 -
Adding Breaks

Word 2010
Adding Breaks


/en/word2010/working-with-lists/content/

Word has several different types of breaks you can add to your document to change the layout and pagination. Each type of break serves a different purpose and will affect the document in different ways. Page breaks move text to a new page before reaching the end of a page, while section breaks create a barrier between parts of the document for formatting purposes. Column breaks split text in columns at a specific point. In this lesson, you'll learn how to insert and delete breaks.
Breaks allow you to have more control over the layout of your document. You might use a page break if you're writing a paper that has a bibliography to ensure the bibliography starts on a new page. You might use a column break if you are using columns and want them to be arranged in a particular way.
Optional: You can download this example for extra practice.
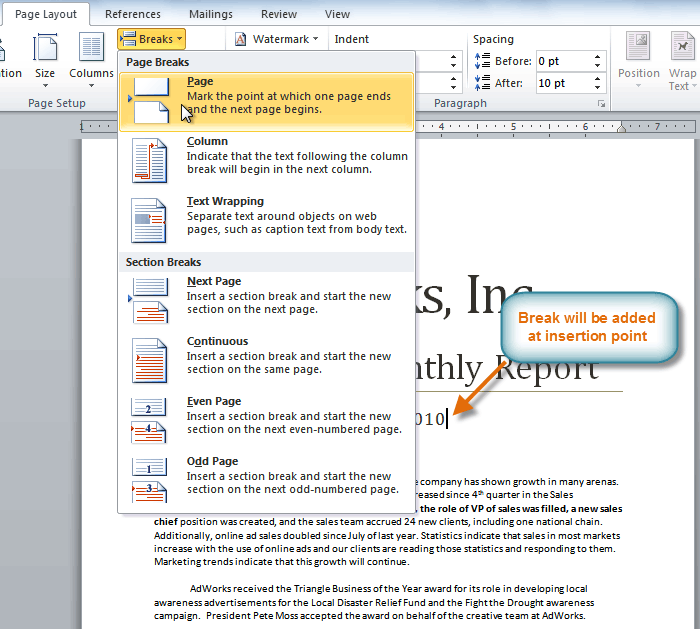
 Adding a page break
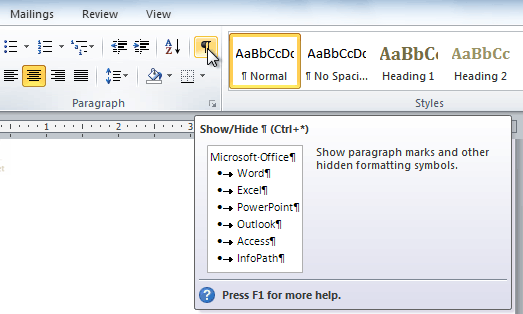
Breaks are hidden by default. If you want to delete a break, you'll probably want Word to show the breaks so you can find them for editing.
 Showing paragraph markings
 Selecting the break
/en/word2010/working-with-columns/content/